|
Lake Renegade Weight and Balance |
|
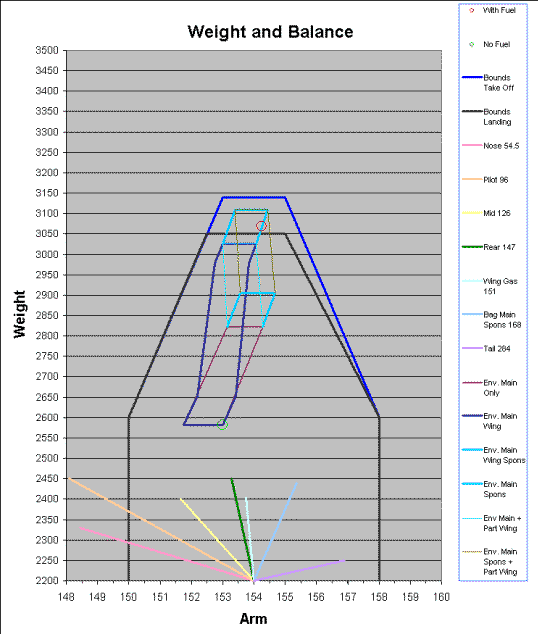
| On this page there is
an example Weight and Balance graph which is an output from an Excel
spreadsheet that I put together. Note: This example is for one particular plane. Any or all of the numbers may be wrong. Do not attempt to use this chart for your plane. It is provided as an example only.
|
|
 |
Key to the Chart The large (Blue/Black) lines are the standard CofG and weight limits. The Red and Green small circles show the actual loading
for a given situation. The "mess" of smaller trapezoids show the total possible
envelope of CofG for all fuel situations. Once one figures out the
lines, one can predict exactly how the W&B will change depending on how
much fuel was loaded, and which tanks are emptied at which point in time. The lines at the bottom of the graph are "load lines." Their slope is correct for weight at any standard station. They can be used to manually modify the graph as explained below.
|
| How to Use the Graph I
have printed out a dozen versions of the graph that show the most common
plane loadings as well as loads that are at various limits. These I
carry in the plane, and most of the time, this is all I need. Maybe a bit confusing at first, but one you do this a few times, W&B calculations are easy. By the way - back to the "mess" of trapezoids. The "width" of the trapezoids comes from the different possible seat positions. If all seats are to the rear, then one would use the right side of the trapezoids. If all seats are to the front, then use the left side. If there is a combination of seat positions, then the W&B will fall somewhere inside the trapezoids. In any case, one has a graphic picture of the possibilities.
|
|